How to insert your fleece tips (or how to lard) your knitting
Larded mittens (or thrummed mittens) originate in the Newfoundland and Labrador region. It is said that sailors who went to sea carried this type of mitts in which small pieces of fiber were inserted.

Here are the steps illustrating how to thrum a stitch.
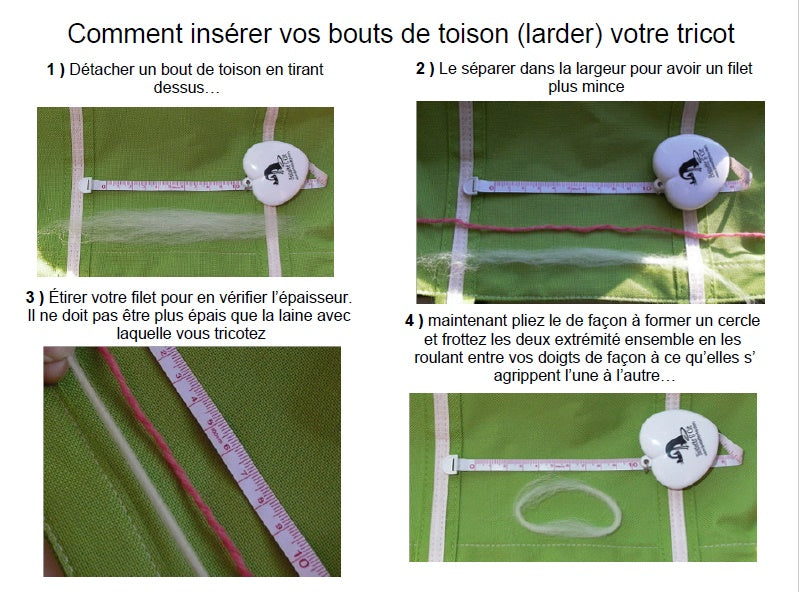
Step 1: Detach a piece of the fleece by pulling on it (do not cut with scissors, this would break the tips of your fibers and make the fleece less "hanging" at your stitches).
Step 2: Separate the fleece in a width direction to obtain a thinner net.
Step 3: Stretch your fleece to check the thickness: it should not be thicker than the wool you knit with.
Step 4: Now fold your fleece to form a circle and rub the two ends together by rolling them between your fingers to felt the wool (the fibers will cling and stick to each other.

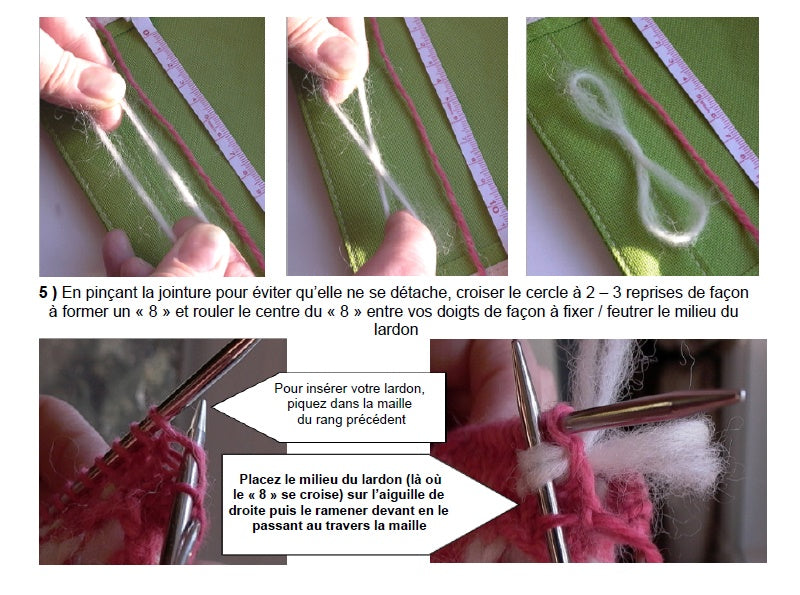
Step 5: Pinching the place where you have closed the circle to prevent it from coming off, cross the circle to form an "8" and roll the center of the "8" between your fingers to felt out the center and fix it in this position.
As shown below, to insert the fleece into the stitch, stitch into the stitch below the one you want to thrum. Place the middle of the fleece (center of "8") on the right needle and bring the fleece in front.

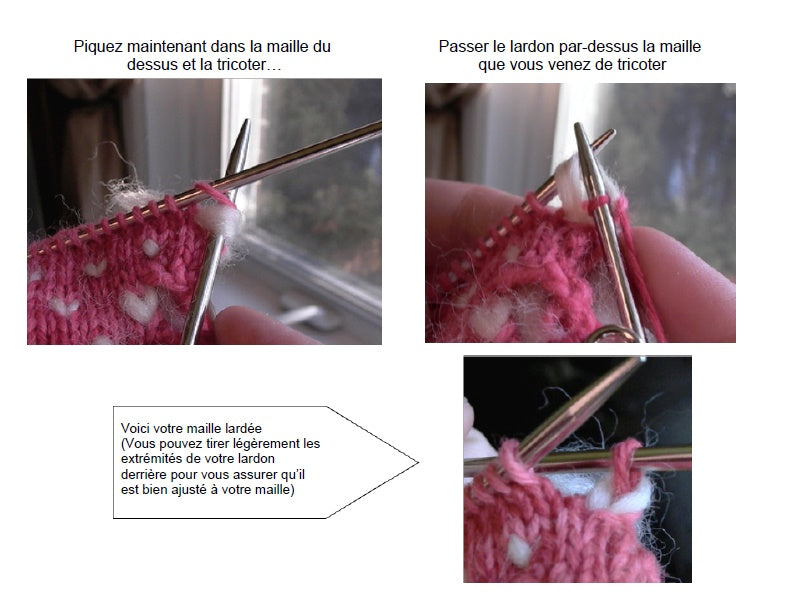
Now, stitch the stitch on the top (the one that is currently on your left needle) and knit this stitch and then pass the fleece over this new stitch (make sure that your two ends of the fleece are also positioned behind your knitting).

And now, voila!!
To put this technique into practice, you will find our free mittens pattern in the knitting patterns section of our site by clicking HERE.
Remember that to make mittens, you need a natural wool that has not been treated with "anti-felting". We need the "felting" properties of wool and matching fleece to make strong, durable thrummed mittens.
Happy knitting !!

